Session 1: Getting Started with Python and Fundamentals
What is Python?
Python is a high-level, readable, and multi-purpose programming language. Its simple syntax makes writing code feel very similar to writing in English, which is why it is widely considered the best choice for beginners.
Essential Tools & Installation
- Installing Python: Visit python.org and download the latest version. (Ensure you check the box "Add Python to PATH" during installation).
- What is PyCharm? A professional Integrated Development Environment (IDE) specifically for Python. It offers smart tools that act as an assistant for large-scale projects.
- What is Jupyter Notebook? An interactive environment that allows you to run code in separate blocks and see the results instantly. It is perfect for learning, data analysis, and quick testing.
- What is Pip? It stands for "Preferred Installer Program." It is a tool used to download and install Python libraries and packages from the internet.
Variables and Data Types
In Python, variables are used to store data. The primary types include:
- int: Integers (e.g.,
10) - float: Floating-point numbers (e.g.,
15.5) - str: Strings or text (e.g.,
"Hello") - bool: Logical values (
TrueorFalse)
Type Detection and Casting
To check a variable's type, use the type() function:
x = 10
print(type(x))  # <class 'int'>
To convert between types (Casting):
y = float(x)   # Convert int to float -> 10.0
s = str(x)     # Convert int to string -> "10"
Input and Output
Use input() to receive data from the user and print() to display results:
name = input("Enter your name: ")
print("Hello", name)
Note: input() always returns a string. If you need a number, you must cast it: int(input()).
Mathematical Operators
- Addition:
+| Subtraction:-| Multiplication:*| Division:/ - Power:
**(e.g.,2 ** 3equals 8) - Modulus (Remainder):
% - Floor Division:
//
Exercise Solutions: Session 1
1. Swapping Two Variables Without a Temporary Variable
Python allows you to swap values in a single line:
a = 5
b = 10
a, b = b, a
print("a:", a, "b:", b)
Explanation: Python creates a "tuple" of the right-hand side first and then unpacks it into the variables on the left.
2. Calculating Tip, Tax, and Total
food_cost = float(input("Enter the meal charge: "))

tip = food_cost * 0.18
tax = food_cost * 0.07
total = food_cost + tip + tax

print(f"Tip: {tip}")
print(f"Tax: {tax}")
print(f"Total: {total}")
Explanation: We cast the input to float for precise decimal calculations, calculated the percentages, and summed them up.
3. Cookie Ingredient Adjuster
Since the original recipe makes 48 cookies, we find the ratio for one cookie and multiply it by the desired amount.
cookies_needed = int(input("How many cookies do you want to make? "))

ratio = cookies_needed / 48

sugar = 1.5 * ratio
butter = 1 * ratio
flour = 2.75 * ratio

print(f"Sugar needed: {sugar} cups")
print(f"Butter needed: {butter} cups")
print(f"Flour needed: {flour} cups")
4. Solving a Quadratic Equation
We use the Discriminant formula: $$Delta = b^2 - 4ac$$.
import math

a = float(input("Enter coefficient a: "))
b = float(input("Enter coefficient b: "))
c = float(input("Enter coefficient c: "))

delta = b**2 - 4*a*c

if delta > 0:
    x1 = (-b + math.sqrt(delta)) / (2*a)
    x2 = (-b - math.sqrt(delta)) / (2*a)
    print(f"Two real roots: {x1} and {x2}")
elif delta == 0:
    x = -b / (2*a)
    print(f"One repeated root: {x}")
else:
    print("This equation has no real roots.")
Explanation: We imported the math library to use sqrt(). The if-elif-else structure handles the three possible mathematical outcomes based on the value of Delta.
Session 2: Logic, Conditionals & Control Flow
1. Comparison Operators (The Basis of Logic)
We use these operators to compare values. The result is always a Boolean value: either True or False.
==: Equal to!=: Not equal to</>: Less than / Greater than<=/>=: Less than or equal to / Greater than or equal to
2. Logical Operators (Combining Conditions)
Sometimes we need to check multiple conditions at once:
and: Returns True if both sides are true.or: Returns True if at least one side is true.not: Inverts the result (turns True to False and vice-versa).
3. Conditional Statements (If, Elif, Else)
This is how we tell Python to make decisions.
Crucial Note: In Python, you must use a colon (:) after each condition, and the next line must be indented (4 spaces). This indentation defines the block of code belonging to that condition.
if: If the condition is true, execute this code.elif: (Short for else if) If the previous condition was false, but this one is true, execute this.else: If none of the above conditions were true, execute this as a fallback.
4. The Match-Case Structure (Python 3.10+)
This is a cleaner alternative to long if-elif chains when you are checking a single variable against multiple specific values. The _ symbol acts as a "default" or "catch-all" case (similar to else).
Programming Challenges: Solutions & Explanations
1. Triangle Analyzer
Goal: Practice comparison operators and nested conditions.
a = float(input("Enter side A: "))
b = float(input("Enter side B: "))
c = float(input("Enter side C: "))

# Checking the Triangle Inequality Theorem
if (a + b > c) and (a + c > b) and (b + c > a):
    if a == b == c:
        print("Result: Equilateral triangle")
    elif a == b or a == c or b == c:
        print("Result: Isosceles triangle")
    else:
        print("Result: Scalene triangle")
else:
    print("Result: Invalid Triangle")
Explanation: First, we check if the sides can mathematically form a triangle. If valid, we enter a "nested" condition to determine its type based on how many sides are equal.
2. Advanced Discount System
Goal: Prioritizing conditions and handling independent logic.
amount = float(input("Enter amount: "))
is_member = input("Are you a member (True/False)? ").lower() == "true"

if amount > 200:
    discount = 0.20 if is_member else 0.10
elif 100 <= amount <= 200:
    discount = 0.05
else:
    discount = 0

final_price = amount * (1 - discount)
print(f"Final Price: {final_price}")

if amount > 500:
    print("Message: You get a Special Gift!")
Explanation: We use elif to define price ranges. Note that the "Special Gift" check is a separate if block because it applies regardless of the specific discount applied.
3. Leap Year Logic
Goal: Understanding complex logic using and, or, and %.
year = int(input("Enter year: "))

if (year % 400 == 0) or (year % 4 == 0 and year % 100 != 0):
    print("Result: It is a Leap Year.")
else:
    print("Result: Not a Leap Year.")
Explanation: A year is a leap year if it's divisible by 400 OR (divisible by 4 AND NOT divisible by 100). We combined this into a single logical expression.
4. Nested Security Check
Goal: Practicing priority in nested structures and using not.
username = input("Username: ")
password = input("Password: ")
is_banned = input("Is user banned (True/False)? ").lower() == "true"

if is_banned:
    print("Result: Account Locked")
else:
    if username == "admin":
        if password == "1234":
            print("Result: Welcome Admin")
        else:
            print("Result: Wrong Password")
    else:
        print("Result: User Not Found")
Explanation: Safety comes first. We immediately check if the user is banned. Only if they are not banned do we proceed to check the username and then the password.
5. Smart Converter (with Match Case)
Goal: Using match case with internal conditional checks.
number = float(input("Enter number: "))
mode = input("Enter mode (1-3): ")

match mode:
    case "1":
        if number < 0:
            print("Negative input not allowed")
        else:
            print(f"Result: {number * 0.62} miles")
    case "2":
        if number < -273.15: # Absolute zero
            print("Negative input not allowed")
        else:
            print(f"Result: {(number * 1.8) + 32} Fahrenheit")
    case "3":
        res = "Even" if number % 2 == 0 else "Odd"
        print(f"Result: The number is {res}")
    case _:
        print("Result: Invalid Code")
Explanation: The match statement allows us to jump to the correct logic based on the user's choice. Inside cases 1 and 2, we added a safety if to handle invalid inputs like negative distances or temperatures below absolute zero.
Session 3: Loops and Repetition Structures
Logic of Repetition in Programming
In algorithmic thinking, one of the fundamental needs is the repeated execution of a command or a specific block of code.
- Main Objective: To prevent the repetition of similar code, optimize program size, and manage the execution of sequential processes.
- Structural Difference from Conditional Statements: A conditional statement executes its dependent code only once if the condition is true; whereas repetition structures or loops continuously execute the code within their body as long as the condition holds true.
The while Loop (Condition-Based Repetition)
The while loop operates based on a logical condition. The body of this loop will be executed repeatedly as long as the condition specified at its beginning holds a true value.
- Structural Note: The variable used in the loop condition must be updated or changed within the loop body. Otherwise, the loop condition will never become false, and the program will enter an infinite loop, which will cause the system to freeze.
Algorithm for Separating Digits of a Number with while
In this algorithm, the loop mechanism is used to separate and print the digits of an integer from right to left:
#!/usr/bin/env python3

# Get an integer from the user
enter = int(input('enter a integer number: '))

while enter != 0:
    number = enter % 10     # Extract the rightmost digit (remainder of division by 10)
    enter = int(enter / 10) # Remove the rightmost digit through integer division

    print(number)           # Print the extracted digit

print('Finish!')
Simulating the do-while Structure (Input Validation)
In Python, there is no separate structure called do-while that guarantees the code executes at least once. To implement this logic, a controlled infinite loop (while True) is used in combination with the break statement.
The following code shows an example of this usage for enforcing the input of a positive number:
#!/usr/bin/env python3

while True:
    enter = int(input('enter a number: '))

    if enter > 0:
        break     # Immediate exit from the loop if the condition is true

print(f'ok! {enter}')
The for Loop and the range Function
When the number of iterations is known in advance, using the for loop is the most optimal choice. This loop iterates over a regular sequence of numbers, which is typically generated by the range function.
Structural rules of the range function:
- range(stop): Generates numbers from zero to stop-1.
- range(start, stop): Generates numbers from start to stop-1.
- range(start, stop, step): Generates numbers from start to stop with specified incremental steps.
In the following program, a for loop is tasked with repeating a specific message along with its numerical index as many times as the number entered by the user:
#!/usr/bin/env python3

enter = int(input('enter a number: '))

# The variable i as a counter changes from 0 to one less than enter
for i in range(enter):
    print(f'{i}) hello')
Loop Control Statements (break and continue)
To manage and change the default behavior of loops under specific conditions, two key statements are built-in:
The break Statement (Complete Stop)
Executing this statement causes the program to immediately exit the loop body and be directed to the first line of code after the loop block.
The continue Statement (Skip Current Iteration)
This statement stops the current iteration, ignores the remaining code in that cycle, and directly sends the program to the beginning of the loop to start the next iteration.
In the following code, the use of the continue statement for filtering and exclusively printing odd numbers is demonstrated:
#!/usr/bin/env python3

n = int(input('enter a number: '))

for i in range(n + 1):
    if i % 2 == 0:
        continue # If the number is even, skip printing and go to the next iteration
    print(f'i -> {i}')
Combined Implementation: Computational Validation
The following program is a comprehensive example of combining both while and for structures. In this structure, first the process of receiving a positive number is guaranteed, and then the sum of even numbers within the specified range is calculated:
#!/usr/bin/env python3

# Phase One: Guarantee receiving a valid positive input
while True:
    n = int(input('Enter a number(number > 0): '))
    if n > 0:
        break

# Phase Two: Calculate the sum of even numbers in the range
sum = 0
for i in range(n + 1):
    if i % 2 == 0:
        sum += i

print(f'sum: {sum}')
Nested Loops
Placing one loop inside the body of another loop forms nested loops. The governing rule for this structure is as follows: for each single complete execution of the outer loop, the inner loop runs completely from start to finish.
The following example implements a standard mathematical multiplication table using this concept:
#!/usr/bin/env python3

# Outer loop to control rows
for i in range(1, 10):
    # Inner loop to control columns and calculations
    for j in range(1, 10):
        # Using end = '' to prevent line breaks and create proper spacing
        print(f'{i} * {j} = {i*j} \t', end='')
    print() # Create a new line after completing each full row
Drawing Geometric Patterns
One of the prominent applications of nested loops is managing two-dimensional spaces and drawing patterns. Three structural patterns are analyzed below:
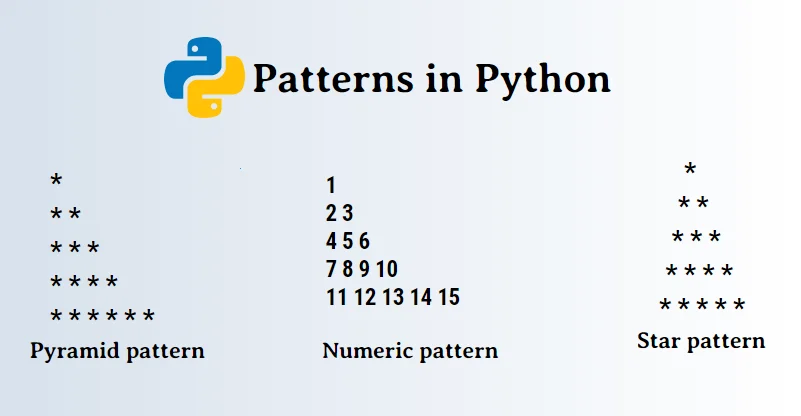
Right-Angled Star Pyramid Pattern
This program, by making the inner loop dependent on the outer loop's counter, increases the number of stars row by row:
#!/usr/bin/env python3

n = int(input('enter a number: '))

for i in range(1, n + 1):
    for j in range(i): # The number of iterations depends on the outer loop's step
        print('* ', end='')
    print()
Incremental Number Triangle Pattern
In this section, instead of printing a fixed character, an independent secondary variable is used to display consecutive numbers:
#!/usr/bin/env python3

n = int(input('enter a number: '))
counter = 1

for i in range(1, n + 1):
    for j in range(i):
        print(f'{counter} ', end='')
        counter += 1 # Increase the counter value after each print
    print()
Symmetrical Pyramid Pattern Based on Spacing
In this structure, controlling the empty spaces before printing the main character is crucial for maintaining the pyramid's symmetry:
#!/usr/bin/env python3

n = int(input('enter a number: ')) # Get the pyramid depth
space = n - 1 # Define the initial number of empty spaces for the first row

for i in range(1, n + 1):
    # Dedicated loop for printing empty spaces
    for j in range(space):
        print(' ', end='')
    space -= 1 # Gradually reduce empty spaces in each row

    # Dedicated loop for printing star characters
    for k in range(i):
        print('* ', end='')
    print()
Session 4: Advanced Data Structures
The Concept of Sequence and Index
When dealing with a collection of data in the programming world, sometimes we need this data to have a specific order. In the Python language, structures that maintain the order of elements are called Sequences. Strings, lists, and tuples are all considered sequences.
When data has order, Python assigns each of them a specific numbered seat. This seat number is called the Index or the numeric identifier of the position. Having this number allows you to directly access the desired member.
What is an Index?
The index is essentially the address or seat number of a member in a queue. In Python, counting positions starts from zero, not one. This means the first member is always in position zero. Python also has another interesting feature: reverse counting. If you want to go from the end of the queue to the beginning, you can use negative numbers. In this case, the last member of the queue has an index of negative one.
For example, consider the following string:
s = "python"
print(s[0])   # Output: p (first character from the left)
print(s[-1])  # Output: n (first character from the right)
Slicing Operation
Sometimes you don't need all the data, but only a portion of it. This operation is called Slicing. The formula and structural pattern for slicing is as follows:
sequence[start:stop:step]
- start: The starting index (inclusive). If omitted, Python assumes the beginning of the sequence (zero).
- stop: The ending index (exclusive). An important rule in Python: the stop index itself is never included. The program slices up to, but not including, the stop index.
- step: The step size or jump interval between elements. If omitted, it defaults to one.
s = "python"
print(s[1:4])   # Output: yth (indices 1, 2, and 3 are extracted; index 4 itself is not included)
print(s[:3])    # Output: pyt (extracts from the beginning up to index 2)
print(s[::2])   # Output: pto (starts from the beginning with steps of 2, taking every other character)
Examining Sample Codes for Strings and Indices
In the code below, a slice with a negative step is written. When the step becomes negative, Python's movement reverses and reads from right to left:
s = 'hello'

print(s[0])       # Output: h
print(s[4:1:-2])   # Output: ol
In the first line, the letter h is printed. In the second line, it starts from index 4 which is the letter o, moves two steps backward to index 2 which is the letter l. Since index 1 (the stop point) is not included in the output, the operation ends here and the output is "ol".
In the next example, we see a program that removes non-numeric characters from text. The ord function in Python returns the ASCII code of a character. The digits zero to nine in the ASCII table have codes between 48 and 57:
enter = input() # Example input: he2llo
result = ''

for i in range(len(enter)):
    # Check if the current character is not a numeric digit
    if ord(enter[i]) < 48 or ord(enter[i]) > 57:
        result += enter[i]

print(result) # Output: hello
This program uses the length of the string (len) to examine each character of the input one by one. If the ASCII code of a character is less than 48 or greater than 57, it means the character is not a number. Consequently, it adds that character to the result variable so that in the end, a pure text without numbers is printed.
In the code below, concatenation of two strings using the plus sign is shown, which is called string concatenation:
s1 = 'hello'
s2 = 'world'

s3 = s1 + ' ' + s2
print(s3) # Output: hello world
The program places a space between the two strings and concatenates them to print a unified phrase.
In the next example, the length of the string is used for reverse addressing:
s = 'python'
print(s[-len(s):-1]) # Output: pytho
The len function returns the length of the string, which is 6. By putting a minus sign, the slice range is set from index -6 to -1. Since index -1 itself (the letter n) is not included in the final slice, the output of the program will be "pytho".
In this section, a program is designed that takes personal information and creates a username based on their letters:
name = input('Name: ') # Sample input: saleh
family = input('Family: ') # Sample input: askari

# Get the first letter of the name, the first letter of the family name in uppercase, and concatenate with indices 1 to 2 of the family name
username = name[0].upper() + family[0].upper() + family[1:3]

print(f'UserName: {username}') # Sample output: SAsk
This program takes the first letter of the name and the first letter of the family name and converts them to uppercase using the upper method. Then it appends the letters at indices 1 and 2 of the family name (family[1:3]) to create a concise username.
Challenge and Problem Solving for the Index Section
Question: Assuming our string is msg = "Networking", how can we use slicing to create the following outputs?
msg = "Networking"

# 1. Extract the character N
print(msg[0])

# 2. Extract the part ing
print(msg[-3:])

# 3. Extract the part work
print(msg[3:7])

# 4. Slice the string so that only letters at even indices are printed
print(msg[::2])
List
Lists are the most widely used data storage containers in Python. Imagine a list as a flexible shelf where you can add items, remove items, or rearrange the order whenever you want. The key feature of lists is Mutability. You are allowed to place different data types (numbers, text, booleans) and even other lists together inside a single list.
Defining and Accessing List Elements
To create a list, we use square brackets [] and separate members with commas. Accessing them is exactly like strings, using their seat number or index:
lst = [10, 20, 30, "hi", True]
print(lst[0])   # Output: 10
print(lst[-1])  # Output: True
Due to the mutability of lists, assigning a new value to a specific index is straightforward and direct:
lst[1] = 999
print(lst)  # Output: [10, 999, 30, 'hi', True]
Key List Management Methods
Lists have many built-in methods for changing and managing data, summarized in the table below:
| Method | Description |
|---|---|
append(x) |
Adds element x to the end of the list |
insert(i, x) |
Inserts element x at the specified index i |
pop(i) |
Removes and returns the element at index i (if no index is provided, removes the last element) |
remove(x) |
Searches for and removes the first element with value x |
clear() |
Removes all elements and empties the list |
sort() |
Sorts the list elements in ascending order |
reverse() |
Reverses the order of elements in the list |
Examining Sample Codes for Lists
In Python, you can place a list inside another list, which is called a nested list or matrix:
l = [True , 12,'hello',12.89,[23,'world']]
l1 = l[4] # Extract the inner list at index 4, which is [23, 'world']

print(l1[1]) # Output: world (index 1 of the inner list)
In this code, the fourth position of the main list itself contains a list with two members. The program first copies this inner list into the l1 variable and then extracts and prints the first position of it, which is the word "world".
In the following code, the behavior and usage of main methods on a list of scores are examined:
score = [12, 18, 17, 18, 18]
print(score)

score.insert(1, 20) # Insert 20 at index 1, pushing other elements forward
score.append(10)     # Add 10 to the end of the list
print(score)        # Output: [12, 20, 18, 17, 18, 18, 10]

score.remove(18)    # Remove the first occurrence of 18
print(score)        # Output: [12, 20, 17, 18, 18, 10]

score.sort()        # Sort in ascending order from smallest to largest
score.reverse()     # Reverse the order of elements
print(f'Sorted(reverse): {score}') # Output: [20, 18, 18, 17, 12, 10]

score.clear()       # Empty the entire list shelf
print(score)        # Output: []
In the next program, we see how to find the largest, smallest, and sum of list members using a simple loop without using Python's built-in functions:
score = [18, 19, 15, 12, 11, 10, 9, 16]

min = 20
max = 0
sum = 0

for item in score:
    sum += item

    if min > item:
        min = item # Update minimum value
    if max < item:
        max = item # Update maximum value

avrage = sum / len(score)
print(f'SumFinal: {sum} \t Avrage: {avrage}')
print(f'Min: {min} \t Max:{max}')
The loop iterates over each score and adds it to the sum variable. In each iteration, if a score is smaller than the current min value, it replaces it, and the same logic is repeated for the max value. At the end, the highest and lowest scores along with the average are obtained.
An interesting point about the insert method: if you provide an index number that exceeds the list length, Python doesn't throw an error but instead adds the new element to the last possible position:
lst = [1, 2, 3]
lst.insert(6, 8)
print(lst) # Output: [1, 2, 3, 8]
The list length is 3 but we requested to insert the number 8 at index 6. Without any objection, Python adds the number 8 to the end of the list.
Challenge and Problem Solving for the List Section
Question: Suppose you have a list like a = [3, 1, 4]. How can you transform it into [1, 3, 4, 10, 20] without creating a new list and using methods?
a = [3, 1, 4]

a.sort()        # Step 1: Sort -> [1, 3, 4]
a.append(10)    # Step 2: Add 10 to the end -> [1, 3, 4, 10]
a.insert(3, 20) # Step 3: Insert 20 at index 3 -> [1, 3, 4, 20, 10]

print(a)
Tuple
Tuples are like the twin siblings of lists but with one very significant and critical difference: tuples are Immutable. Once you create a tuple, you cannot add members to it, remove anything from it, or change the value at any position. A tuple is like a sealed document. Tuple elements are placed inside parentheses (). Tuples are preferred for fixed data due to the high security they provide against data modification and their optimal memory consumption.
Limited Tuple Methods
Due to the immutable nature of tuples, modification methods (like append or remove) do not exist. Their tools are limited to searching and counting:
count(x): Counts the number of occurrences of valuexin the tuple.index(x): Finds the index of the first occurrence of valuex.
Examining Sample Codes for Tuples
You might wonder what to do if you are forced to change data within a tuple. The solution is to temporarily remove the tuple's mask, convert it to a list, apply the changes, and then convert it back to its original form:
t = ('saleh', 'askari', 23)
print(type(t)) # Output: <class 'tuple'>

t = list(t)    # Convert to a dynamic list
t[0] = 'ahmad' # Apply change to index zero

t = tuple(t)   # Convert back to a secure and locked tuple
print(t)       # Output: ('ahmad', 'askari', 23)
In the following example, the use of search methods on fixed values is demonstrated:
data = (5, 2, 9, 2, 2)
print(data.count(2))  # Output: 3 (the number 2 appears three times)
print(data.index(2))  # Output: 1 (the first occurrence of 2 is at index 1)
Challenge and Problem Solving for the Tuple Section
Question: How can you extract the middle values (20, 30, 40) from the tuple t = (10, 20, 30, 40, 50) using slicing?
t = (10, 20, 30, 40, 50)
result = t[1:4]
print(result) # Output: (20, 30, 40)
We start the slice from index 1 (the number 20) and set it up to index 4 so that index 4 itself is not included and only the three middle numbers are extracted.
Dictionary
In real life, to find the meaning of a word, we don't search by page number; we search for the word itself. Dictionaries in Python work exactly the same way. They are a non-sequential data structure based on Key-Value mapping. In dictionaries, there is no concept of numeric indices (zero, one, two); instead, we have key-value pairs. You provide a unique key (like a word or national ID) and Python returns the corresponding value (like the meaning or personal details). Dictionary elements are placed inside curly braces {}.
Dictionary Structure Methods
| Method | Description |
|---|---|
keys() |
Returns a collection of all keys in the dictionary |
values() |
Returns a collection of all stored values in the dictionary |
items() |
Returns key-value pairs as sequences of tuples |
update(dict) |
Updates the current dictionary with data from another dictionary |
pop(key) |
Removes the specified key and returns its value |
popitem() |
Removes and returns the last key-value pair inserted |
get(key, default) |
Gets the value for a key (prevents errors if key doesn't exist by returning a default value) |
Examining Sample Codes for Dictionaries
Modifying values or adding new pairs is done by referencing the key. In the code below, the usage of the keys method for iterating over keys and their corresponding values is shown:
d = {'name': 'saleh', 'family': 'askari', 'birth_day': (1382, 7, 22)}

for key in d.keys():
    print(f'{key} -> {d[key]}')
The keys method provides the loop with a list of all the titles or keys in the dictionary so we can print each key and its corresponding values one by one.
Combining lists and dictionaries can create very complex and powerful data structures, such as a university management database system:
students = []

student = {
    'student_code': '40113119821',
    'name': ('saleh', 'askari'),
    'birth_day': (1382, 7, 22),
    'course': {
        'AI': {'unit': 3 , 'score': 20},
        'DB': {'unit': 3 , 'score': 15},
        'QH': {'unit': 2 , 'score': 11}
    }
}
students.append(student)

for i in range(len(students)):
    for key in students[i].keys():
        if key == 'name':
            print(f"name: {students[i][key][0]} \t family: {students[i][key][1]}")
            continue
        if key == 'birth_day':
            print(f"birth day: {students[i][key][0]}/{students[i][key][1]}/{students[i][key][2]}")
            continue
        print(f'{key}: {students[i][key]}')
In this example, complete information of a student including name (as a tuple) and courses (as a nested dictionary) is placed inside a larger dictionary, and this dictionary is added to the general list of students. Then, with the help of loops and defined conditions, the information is extracted and displayed in a detailed manner.
Challenge and Problem Solving for the Dictionary Section
Question: How can you filter the names of students who have scores above 15 from a dictionary of student scores (scores) and place them in a separate list?
scores = {"Ali": 18, "Sara": 20, "Reza": 12}
high_scorers = []

for name, score in scores.items():
    if score > 15:
        high_scorers.append(name)

print(high_scorers) # Output: ['Ali', 'Sara']
Using the items method, in each iteration of the loop we simultaneously access the key (name) and the value (score). The condition checks if the score is greater than 15, and if so, adds the person's name to the new list.
Set
A Set is a data structure with two fundamental characteristics: its elements are unordered and no duplicate members are allowed. You cannot say first or second member because positions are not stable and are constantly changing. This structure is excellent for situations where you want to immediately remove duplicate data. Set elements are defined inside curly braces {}.
Set Management Methods
add(x): Adds a new memberxto the set.discard(x)/remove(x): Removes a specified member from the set (unlikeremove, thediscardmethod does not throw an error if the member doesn't exist).
Examining Sample Codes for Sets
To add a new member to a set, we use the add method. If duplicate data is entered, Python automatically removes the extra values:
s = {1, 2, 3, 4, 5}
s.add(6)
print(s) # Output: {1, 2, 3, 4, 5, 6}
Challenge and Problem Solving for the Set Section
Question: If we have two sets, how can we implement the main mathematical operations (union, intersection, difference, and symmetric difference) on them?
a = {1, 2, 3, 4}
b = {3, 4, 5, 6}

# 1. Find common members in both sets (intersection)
print(a & b) # Output: {3, 4}

# 2. Members that are in either set but not in both (symmetric difference)
print(a ^ b) # Output: {1, 2, 5, 6}

# 3. Members that are in the first set but not in the second (difference)
print(a - b) # Output: {1, 2}

# 4. Combine and unify all members of both sets (union)
print(a | b) # Output: {1, 2, 3, 4, 5, 6}
Continuous Input Until Exit
One of the most widely used patterns in programming is combining loop concepts with list data structures for dynamic and continuous collection of data from the user. Suppose you want to enter scores for a class but you don't know the number of students in advance. The solution is to create an infinite loop and define a specific number (like -1) as the exit condition:
score = []

while True:
    enter = int(input('Enter a Score(enter -1 to end): '))

    if enter == -1:
        break # Exit the loop immediately when -1 is entered

    score.append(enter) # Add the score to the scores list

print(f'Score: {score}')
The program continuously receives scores from the user and adds them to the list. This process continues until the user enters exactly -1. Upon entering -1, the break statement executes, the loop stops, and the final list of scores is displayed.
Session 5: Functions and Code Localization
The Concept of Function and Why We Use It
In the real world, to make a cup of coffee, you don't reinvent the coffee machine or assemble its parts every time. You press the machine's button, and the machine does the behind-the-scenes work and delivers the coffee to you.
In programming, a Function is exactly like that coffee machine. A function is a named block of code that you design once, write instructions inside it, and then wherever in your program you need that task, you just call its name.
Using functions gives us several major benefits:
- We are saved from writing repetitive code and long copy-pastes.
- If there's a mistake somewhere in our code, we only need to fix it inside that block, and the entire program gets fixed.
- Our program becomes very clean, readable, and organized, as if it's closer to human language.
Defining and Calling a Function
To create a function in Python, we use the keyword def, which is short for "define". We put a name for the function in front of it and place a pair of parentheses. All the code that is supposed to go inside this block must have one level of indentation (spaces) so that Python understands these instructions belong to this function.
Until you call the function, the code inside it will not execute. Calling or invoking the function means bringing its name along with the parentheses later in the program.
def say_hello():
    print("Hello, welcome to the Python class!")

# Calling the function
say_hello()
When the program reaches the last line, it sees the function name, goes to the say_hello block, prints the message inside it, and returns to the main path of the program.
Input-Oriented Functions or Arguments
Imagine a juicer; if you give it oranges, it gives orange juice, and if you give it apples, it gives apple juice. Functions can also take inputs to perform different tasks based on those inputs. In programming terminology, these inputs are called parameters (when defining the function) or arguments (when calling the function and passing actual values).
Functions with One or Multiple Inputs
You can define as many variables as needed inside the function parentheses to serve as inputs. These variables only exist and work inside that specific function.
def greet(name):
    print("Hello", name, "have a nice day!")

greet("Ali")
greet("Sara")
In this code, once the word "Ali" goes into the variable name and the message is printed for Ali, and in the next round, this process repeats for "Sara".
If a function has multiple inputs, the order of passing values is very important:
def show_score(student_name, score):
    print(f"The Python score for {student_name} is: {score}")

show_score("Reza", 18)
show_score(20, "Maryam") # This line prints incorrectly and breaks the logic
In the first call, Reza is passed as the name and 18 as the score, which is perfectly correct. But in the next line, due to not following the order, the number 20 is introduced as the student's name, creating a logical error.
The Magic of Return Values or the Return Statement
This is one of the most important and crucial parts of learning functions. Suppose you ask your friend: "Write on the blackboard, what is 2 plus 2?" They do this, and you just see the result on the board. This is similar to the print statement.
Now suppose you tell your friend: "Add 2 and 2, keep the answer in your hand, and give it back to me so I can buy a car with that answer!" This is called returning or giving back a value, which in Python is done with the return statement.
When a function returns a value, that answer settles in the program line, and you can store it in a new variable, use it in subsequent calculations, or even pass it to another function.
Deep Dive into the Difference Between print and return
Let's see this big difference with a tangible piece of code:
def func_print():
    print("Hello")

def func_return():
    return "Hello"

x = func_print()
y = func_return()

print("Value stored in x:", x)
print("Value stored in y:", y)
The output of this code is fascinating:
When func_print is called, the word "Hello" is printed on the screen. But this function doesn't give anything back to variable x! So variable x remains empty, and its value becomes None (meaning nothing).
But when func_return executes, the word "Hello" is not printed on the screen; instead, this string is given as a gift to variable y. Now variable y owns the word "Hello" and can be easily printed or used in later lines.
A golden rule in Python: as soon as the program reaches the return statement inside a function, that function's work ends immediately and at that very moment, and it jumps out of the function. Any code written after return will never be executed.
Advanced Input Management
Python has designed very flexible tools for function inputs to give programmers freedom in passing information.
Default Arguments
Sometimes you want the function to consider a default value if the user doesn't pass a value for an input, so the program doesn't encounter an error.
def power(base, exp=2):
    return base ** exp

print(power(5))
print(power(5, 3))
In the first call, we only passed one number (the base). Python notices that the second input hasn't been passed, so it automatically considers the number 2 for the exponent and raises 5 to the power of 2 (result 25). In the second call, since we passed the number 3 ourselves, the default value is ignored and 5 is raised to the power of 3 (result 125).
Keyword Arguments
If you remember, we said that in functions with multiple inputs, order is very important. But if you write the variable names when calling, the order no longer matters:
def display_info(name, job):
    print(f"Name: {name} | Job: {job}")

display_info(job="Programmer", name="Saleh")
Even though we wrote "job" first and "name" second, Python intelligently places the values in their correct positions based on the key names.
The Magic of Asterisks in Variable-Length Arguments
Sometimes you write a function where you don't know how many inputs the user is going to pass! For example, you want to create a function that calculates the average of grades; one user might enter 3 grades and another might enter 10. Python has two excellent tools for this using the asterisk symbol.
The Single-Asterisk Tool or *args
When you put an asterisk before a parameter name, you're telling Python: "Accept any number of values that come in and package them into a Tuple."
def calculate_average(*numbers):
    total = sum(numbers)
    return total / len(numbers)

print("First set average:", calculate_average(10, 20, 30))
print("Second set average:", calculate_average(18, 19, 15, 20, 14))
The function dynamically realizes that in the first call it has a 3-member tuple and in the second call it has a 5-member tuple, performing calculations without any issues.
The Double-Asterisk Tool or **kwargs
This tool is for when the user wants to send information as named pairs (key and value), and the count is also unspecified. Python packages this information into a Dictionary.
def save_user_profile(**info):
    print("Received data type:", type(info))
    for key, value in info.items():
        print(f"{key}: {value}")

save_user_profile(username="saleh_99", age=23, country="Iran")
The program converts all these inputs into a dictionary so you can loop through the keys and values and perform database operations.
Variable Scope: Local vs Global
Variables in Python have a specific scope or lifetime. Understanding this scope prevents many strange bugs in your program.
Local Variables
Any variable created inside a function is called local. This variable is like an employee inside a room; outside that room, no one knows them, and as soon as the function's work is done, that variable is also erased from the computer's memory.
def test_scope():
    inside_variable = 50
    print("Inside function:", inside_variable)

test_scope()
# print(inside_variable) -> This line gives a severe error because such a variable doesn't exist outside the function!
Global Variables and the global Keyword
Variables created in the main program space (outside all functions) are called global. All functions can see and read the value of this variable, but they cannot directly change its value!
If a function wants to manipulate a global variable outside itself and assign a new value to it, it must use the global keyword to tell Python that it intends to directly affect the original variable:
sugar_bags = 10 # Global variable

def hire_employee():
    sugar_bags = 20 # This is a new local variable with the same name and doesn't affect the outside variable

def hire_warehouse_manager():
    global sugar_bags
    sugar_bags = 50 # This command changes the main outside variable

hire_employee()
print("After employee:", sugar_bags) # Still 10

hire_warehouse_manager()
print("After warehouse manager:", sugar_bags) # Changed to 50
Recursive Functions: A Function That Calls Itself
Recursive functions are one of the fascinating and challenging topics in programming. Imagine a repeating image in a mirror that contains another mirror inside itself. A recursive function is a function that, within its own body, calls itself again!
To prevent these types of functions from getting stuck in an infinite loop and crashing the computer, having a Base Case is absolutely mandatory. That is, we must have a point where we say "That's enough, return."
Tangible Example: Calculating Factorial
We remember from math; factorial of 5 means (5 \times 4 \times 3 \times 2 \times 1). We can say factorial of 5 equals 5 times factorial of 4! This chain continues backwards until it reaches 1.
def factorial(n):
    # Critical base case
    if n == 1:
        return 1

    # Recursive step that calls itself again with a smaller number
    return n * factorial(n - 1)

print("Factorial of 5 is:", factorial(5))
When factorial(5) is called, Python calculates: 5 * factorial(4). But it doesn't know the answer for factorial of 4 yet! So it goes to calculate factorial of 4, which becomes 4 * factorial(3). This ladder is built downwards, and when it reaches 1, the base case executes, and the values are multiplied in a chain from bottom to top, giving the final answer of 120.
Exercises and Challenges
To make all the above concepts fully ingrained in your mind, let's solve some practical and realistic challenges together.
Challenge: Filtering and Calculating Grades
Question: Write a function that takes a list of student grades, removes grades below 10 (since they've failed!), and calculates and returns the average of the passing grades.
def clean_and_average(all_scores):
    passed_scores = []

    for score in all_scores:
        if score >= 10:
            passed_scores.append(score)

    if len(passed_scores) == 0:
        return 0 # If no one passed, the average is zero

    total = sum(passed_scores)
    return total / len(passed_scores)

scores_list = [18, 7, 15, 9, 20, 11]
final_result = clean_and_average(scores_list)
print("Average of passing students in the class:", final_result)
Challenge: Creating an Advanced Shopping Invoice with Variable-Length Arguments
Question: Write a function that takes a customer's name and then receives any number of products they've purchased (along with their prices). The function should print a neat invoice and return the total price.
def print_invoice(customer_name, **items):
    print(f"--- Invoice for Mr./Ms. {customer_name} ---")
    total_price = 0

    for item_name, price in items.items():
        print(f"Item: {item_name} \t Price: {price} Tomans")
        total_price += price

    print("---------------------------------------")
    return total_price

# Calling the function with different purchased items
final_bill = print_invoice("Saleh", laptop=35000000, mouse=450000, keyboard=1200000)
print(f"Final payable amount: {final_bill} Tomans")
Challenge: Countdown Using Recursion
Question: Write a function that takes a number and counts down to zero in reverse order, printing the characters, but without using for or while loops.
def countdown(number):
    # Base case
    if number < 0:
        print("Blast off!")
        return

    print("Number:", number)
    # Calling itself with a smaller number
    countdown(number - 1)

countdown(5)
Session 6: File Management and Structural Error Control
The Concept of Working with Files and Its Importance in Programming
So far, all the variables, lists, and dictionaries we created in our programs were temporary. Meaning that as soon as the program execution ended or we turned off the computer, all that data was erased from temporary memory (RAM).
In the real world, we need to store our data permanently. Working with files in Python allows us to write data to permanent storage (hard disk) so it persists, or read previously stored data and process it.
Types of Files and How to Open Them
Files are generally divided into two categories: Text files and Binary files. In this session, we will practice working with text files and structured files. For working with any file in Python, we follow three main steps: opening the file, performing operations (reading or writing), and closing the file.
The open function is used to open a file. This function takes two main arguments: the file name and the Mode for opening the file. The main modes are:
- Mode
r(Reading): Only for reading the file. If the file doesn't exist, the program throws an error. - Mode
w(Writing): For writing to the file. If the file doesn't exist, it creates it. If it exists, it deletes all previous content and writes from scratch! - Mode
a(Appending): For adding data to the end of the existing file without deleting previous content.
The Smart 'with' Statement
In the old method, if we forgot to close the file with the close command after opening it, the file would remain locked in system memory, and over time, the computer's memory would fill up. Python has introduced an extremely secure structure called with. When you write your code under the with block, as soon as your work is done or even if an error occurs in the middle of your program, Python automatically closes the file for you.
Working with Simple Text Files (txt)
Let's start with the simplest type of file: regular text files.
Writing to a Text File
Using the write method, we can write text into a file. To go to the next line, we use the \n character.
with open("students.txt", "w", encoding="utf-8") as file:
    file.write("Saleh Askari\n")
    file.write("Ali Moradi\n")
    file.write("Mohammad Nazari\n")
The encoding="utf-8" parameter tells Python that we want to store Persian characters correctly without corruption.
Reading from a Text File
There are different ways to read a file. The read method reads the entire file at once. However, the best and most efficient method for line-based files is to iterate over the file with a simple for loop. Python treats each line as an item:
with open("students.txt", "r", encoding="utf-8") as file:
    for line in file:
        # The strip method removes extra spaces and newlines at the end of the line
        print("Student name:", line.strip())
Introduction to the Popular JSON Structure
Simple text files are great for everyday note-taking, but they are not suitable for storing complex information (like a student's information along with their grades and courses). This is where the JSON format comes in. JSON stands for JavaScript Object Notation and is a global standard for transferring and storing data in web and mobile applications.
The appearance of the JSON structure is exactly like nested dictionaries and lists in Python. To work with this format, Python has a ready-made library called json that we need to import at the top of our program. The two main methods we work with are:
json.dump: Converts a Python dictionary or list to JSON structure and saves it in a file.json.load: Reads a JSON file and directly converts it to a Python dictionary or list.
Storing Structured Information in a JSON File
Suppose we want to store a user's complete profile information in a categorized way:
import json

user_profile = {
    "username": "saleh_askari",
    "skills": ["Python", "Linux", "Network"],
    "is_active": True,
    "age": 23
}

with open("profile.json", "w", encoding="utf-8") as json_file:
    # The indent argument is used to save the JSON file with readable tabs and spaces
    json.dump(user_profile, json_file, indent=4)
If you open the profile.json file, you will see the data stored with excellent structural organization.
Reading Information from a JSON File
Now let's read the same JSON file and treat it as a dictionary in our program:
import json

with open("profile.json", "r", encoding="utf-8") as json_file:
    data = json.load(json_file)

print("Retrieved data type:", type(data))
print("Username:", data["username"])
print("First skill:", data["skills"][0])
Working with Tabular Files (CSV)
CSV files stand for Comma-Separated Values. These files store information in rows and columns, separating the items in each row with a comma. The biggest advantage of CSV files is that they can be opened directly in Excel or Google Sheets as clean tables.
Python also has a dedicated library called csv for these files.
Writing Tabular Data to a CSV File
Let's write a list of products and their prices into a tabular file:
import csv

products = [
    ["Product Name", "Price (Toman)", "In Stock"],
    ["Laptop", 35000000, "Yes"],
    ["Mouse", 450000, "Yes"],
    ["Keyboard", 1200000, "No"]
]

with open("inventory.csv", "w", newline="", encoding="utf-8") as csv_file:
    writer = csv.writer(csv_file)
    # The writerows method writes all nested lists as rows in the file
    writer.writerows(products)
Note: The newline="" parameter ensures that no extra blank lines are created between rows across different operating systems.
Reading Data from a CSV File
Now let's read the created table and display its information row by row:
import csv

with open("inventory.csv", "r", encoding="utf-8") as csv_file:
    reader = csv.reader(csv_file)
    for row in reader:
        # The row variable in each iteration is a list of cells in that row
        print(f"Product: {row[0]} \t| Price: {row[1]} \t| Stock: {row[2]}")
Error and Exception Management (Try, Except, Finally)
In the real world, things don't always go smoothly! Suppose you've written a program to read a file from the desktop, but the user has mistakenly deleted that file. Or you ask the user to enter their age, but they type "twenty" in letters. In these cases, your program crashes, shows scary red system error messages to the user, and stops working.
These runtime errors are called Exceptions. A professional programmer must anticipate and manage these errors so that even if a problem occurs, the program continues smoothly and displays an appropriate message to the user. Python's tool for this is the try and except blocks.
Structure of the Error Management Block
tryblock: We write code that is suspicious of errors (like opening a file or getting user input) in this section.exceptblock: If an error occurs in the try section, Python immediately stops executing the code above and moves to this section. Here we specify what response to show in case of any error.finallyblock: This section is completely loyal! Whether an error occurs in the try section or the program runs perfectly, the code insidefinallywill be executed under any circumstances at the end. This is a great place for tasks like closing network connections or databases.
Practical Example of Error Management in Data Conversion and Files
Let's write a program that manages both file-not-found errors and calculation errors:
try:
    with open("numbers.txt", "r") as file:
        content = file.read()
        number = int(content) # Potential error in converting text to number
        result = 100 / number # Potential error in division by zero
        print("Calculation result:", result)

except FileNotFoundError:
    print("Error: The file numbers.txt was not found on the system!")

except ValueError:
    print("Error: The content inside the file is not a valid number!")

except ZeroDivisionError:
    print("Error: The number inside the file is zero, and division by zero is not possible!")

except Exception as error:
    # This section acts as a general safety net for other unpredicted errors
    print(f"An unexpected error occurred: {error}")

finally:
    print("File checking operation completed.")
With this structure, our program will never crash under any circumstances and will display an appropriate Persian message to the user based on each scenario.
Some famous errors you should know:
ValueError      # Invalid value
TypeError       # Wrong data type
IndexError      # Index out of range
KeyError        # Key not found
FileNotFoundError # File not found
ZeroDivisionError # Division by zero
NameError       # Variable not defined
AttributeError  # Attribute or method doesn't exist
Exception       # Parent of most errors
Challenges and Exercises
To fully solidify the concepts of this session, we will examine three combined and advanced challenges with line-by-line analysis of the solution approach.
Challenge: Registration and Login System with Text File
Question: Write a program that has a menu including "Register National IDs" and "Display People". The program should save entered national IDs in a text file. If the user enters a duplicate national ID, the system should prevent registration and show an error. Also, if the file doesn't already exist, the program should not crash.
Solution Approach and Code Logic Explanation:
To solve this problem, we first need to check if the file exists. The best way is to open the file in read mode (r); if the file doesn't exist, a FileNotFoundError occurs, which we handle in the except section and create the file for the first time. To prevent duplicates, we read all national IDs in the file and store them in a Set (since sets don't have duplicate members and searching is fast in them). If the new national ID is not in this set, we append it to the end of the file using append mode (a).
def load_national_codes():
    codes = set()
    try:
        with open("database.txt", "r", encoding="utf-8") as file:
            for line in file:
                codes.add(line.strip())
    except FileNotFoundError:
        # If the file doesn't exist, it means no one has registered yet, so we create an empty file
        with open("database.txt", "w", encoding="utf-8") as file:
            pass
    return codes

def register_user(new_code):
    existing_codes = load_national_codes()

    if new_code in existing_codes:
        print("Error: This national ID is already registered in the system!")
        return

    with open("database.txt", "a", encoding="utf-8") as file:
        file.write(new_code + "\n")
    print("Your registration was successful.")

# Testing the program
register_user("1234567890")
register_user("1234567890") # This time it will show duplicate message
Challenge: Data Backup and Conversion from CSV to JSON
Question: We have a store information file in tabular format (CSV). Write a program that reads this file, calculates the price of each product with 9% value-added tax, and saves the final output as a modern structured file (JSON) for backup.
Solution Approach and Code Logic Explanation:
In the first step, we open the tabular file with the csv library. Since the first row contains headers (product name, price), we need to skip it with the next command so it doesn't enter mathematical calculations. Then we move row by row, convert the price (which is in text format) to a decimal number, apply tax to it, create a dictionary for each product, and add it to a main list. In the final step, we save this list of dictionaries in a new file with json.dump.
import csv
import json

def convert_csv_to_json(csv_filename, json_filename):
    data_list = []

    try:
        with open(csv_filename, "r", encoding="utf-8") as csv_file:
            reader = csv.reader(csv_file)
            # Skipping the first row (headers)
            header = next(reader)

            for row in reader:
                item_name = row[0]
                base_price = float(row[1])
                # Calculating price with 9% tax
                final_price = base_price * 1.09

                # Creating a dictionary for each product
                product_dict = {
                    "product_name": item_name,
                    "original_price": base_price,
                    "tax_included_price": round(final_price, 2)
                }
                data_list.append(product_dict)

        # Writing the output to JSON file
        with open(json_filename, "w", encoding="utf-8") as json_file:
            json.dump(data_list, json_file, indent=4, ensure_ascii=False)
        print("Format conversion and tax calculation completed and saved successfully.")

    except FileNotFoundError:
        print("Error: The source CSV file was not found!")
    except ValueError:
        print("Error: Some prices in the file are not valid numbers!")

# Simulating the challenge execution
# For actual execution, the inventory.csv file from previous challenges should exist first.
convert_csv_to_json("inventory.csv", "backup_products.json")
Challenge: Crash-Proof Calculator with Continuous Input Receiving
Question: Write a program that in an infinite loop, takes two numbers and a mathematical operator (addition, subtraction, multiplication, division) from the user and prints the result. The program should be hardened with error management so that if the user enters text instead of numbers, or tries to divide by zero, the program displays an appropriate message and without exiting the loop, asks for correct input again. The user can exit the program by typing "exit".
Solution Approach and Code Logic Explanation:
We write the input receiving commands inside a while True loop. To prevent the program from crashing with incorrect inputs, we put the entire calculation and receiving process inside a try block. If the user types "exit" at any stage, we escape the loop with the break command. Otherwise, we convert the values to numbers. The ValueError catches text-to-number conversion errors, and ZeroDivisionError catches division by zero errors, and the loop continues to the next iteration without interruption.
print("--- Welcome to the Python Secure Calculator (type 'exit' to quit) ---")

while True:
    try:
        user_input1 = input("First number: ").strip()
        if user_input1.lower() == "exit":
            break

        operator = input("Mathematical operator (+ , - , * , /): ").strip()

        user_input2 = input("Second number: ").strip()
        if user_input2.lower() == "exit":
            break

        # Converting inputs to floating point numbers
        num1 = float(user_input1)
        num2 = float(user_input2)

        # Performing calculations based on operator
        if operator == "+":
            print("Result:", num1 + num2)
        elif operator == "-":
            print("Result:", num1 - num2)
        elif operator == "*":
            print("Result:", num1 * num2)
        elif operator == "/":
            print("Result:", num1 / num2)
        else:
            print("Error: The entered operator is invalid!")

        print("-" * 30)

    except ValueError:
        print("Input Error: Please only use numbers! Try again.")
        print("-" * 30)
    except ZeroDivisionError:
        print("Math Error: Division by zero is not possible! Try again.")
        print("-" * 30)

print("Thank you for using our program. Exiting.")
Session 7: Object-Oriented Programming (OOP)
Class and Object Concept
Until now, we have been writing our programs in a structured or functional way; that is, we defined a number of variables and created functions that perform operations on these variables. This method is excellent for small programs, but when a project becomes large, managing hundreds of scattered variables and functions turns into a nightmare.
Object-Oriented Programming, abbreviated as OOP, is a new perspective on the world of coding. In this method, we try to simulate the real world. In the real world, we deal with "objects": cars, humans, laptops, or even a bank account. Each of these objects has two main characteristics:
- Attributes: Data or information related to that object (e.g., car color, human name).
- Methods: Actions that the object can perform (e.g., car moving, human speaking).
What is the difference between a class and an object?
Imagine a car manufacturing factory. Engineers first design a blueprint or initial template for the car. This blueprint is not a car itself; you cannot ride the blueprint and drive it! But the factory can use this blueprint to produce thousands of actual cars with different colors and specifications.
In Python programming:
- Class: The blueprint, template, or general instruction manual.
- Object: The actual car built from that blueprint. The process of creating an object from a class is called instantiation.
Creating the First Class and Object in Python
To create a class, we use the class keyword. According to a convention among programmers, we start class names with a capital letter.
class Car:
    pass # We'll leave the class body empty for now
Now let's create two actual objects or cars from this template:
car1 = Car()
car2 = Car()

print(type(car1)) # Output shows that this is an object of the Car class
Class Constructors and the init Method
When a car leaves the factory, right from the first moment it has a color, its model is determined, and its number of gears is set. We cannot build a car that has no specifications.
In Python, to set the initial specifications of an object as soon as it is created, we use a special and magical function called the Constructor. Its name is always fixed: __init__ (two underscores at the beginning and two underscores at the end).
Understanding the use of the self keyword
When you write code related to a class, how does Python know which car's attributes to modify? This is where the keyword self comes in. self refers to the same object that is currently being created or operated on. When we say self.color, it means the color of "this very car you are building".
class Car:
    # Constructor function with initial specifications
    def __init__(self, brand, model, color):
        self.brand = brand   # Car brand
        self.model = model   # Car model
        self.color = color   # Car color
        self.speed = 0       # Initial speed of all cars is zero

# Now when creating an object, we pass the specifications
my_car = Car("Toyota", "Corolla", "White")
friend_car = Car("BMW", "X5", "Black")

print(my_car.brand)     # Output: Toyota
print(friend_car.brand) # Output: BMW
Class Attributes and Behaviors (Methods)
The attributes we created inside __init__ are object variables. Now it's time to add "behavior" to our class. Behaviors of a class are functions written inside the class, and they are called Methods. The only difference between these functions and regular functions is that their first parameter must always be self so they can access the object's own data.
class Car:
    def __init__(self, brand, model, color):
        self.brand = brand
        self.model = model
        self.color = color
        self.speed = 0

    # Method to display information
    def show_info(self):
        print(f"Car: {self.brand} {self.model} | Color: {self.color} | Speed: {self.speed}")

    # Method to accelerate and increase speed
    def accelerate(self, amount):
        self.speed += amount
        print(f"Car accelerated! Current speed: {self.speed}")

# Using the methods
my_car = Car("Persia", "Pars", "Gray")
my_car.show_info()

my_car.accelerate(40)
my_car.accelerate(20)
my_car.show_info()
Inheritance
Suppose you want to create a new class for "Truck" and a class for "Motorcycle". Trucks and motorcycles, like cars, have features such as brand, model, color, and speed, and they also perform the action of accelerating. Is it logical to copy all the code we wrote for the Car class and write it again for the truck? Not at all!
In object-oriented programming, there is a wonderful feature called Inheritance. Inheritance allows us to create a general class (parent or base class) and then create more specialized classes (child or derived classes) from it. The child class inherits all the attributes and behaviors of the parent class, and it can also have its own new features.
Implementing Inheritance and the super Keyword
Let's create a base class called Vehicle and make the car and truck its children:
# Parent class
class Vehicle:
    def __init__(self, brand, model):
        self.brand = brand
        self.model = model

    def honk(self):
        print("Beep beep!")

# Child class (the class inside parentheses means who it inherits from)
class Truck(Vehicle):
    def __init__(self, brand, model, capacity):
        # The super command passes specifications to the parent class constructor
        super().__init__(brand, model)
        self.capacity = capacity # Truck-specific feature (load capacity)

    def load_cargo(self):
        print(f"Truck loaded. Capacity: {self.capacity} tons")

# Creating an object from the child class
heavy_truck = Truck("Volvo", "FH500", 25)

# Inherited method from parent
heavy_truck.honk()

# Child's own specific method
heavy_truck.load_cargo()
Polymorphism
The word polymorphism simply means "a consistent behavior with different execution forms".
Suppose we have a "play sound" button. If we press this button on a "Cat" object, it makes a meow sound. If we press the same button on a "Dog" object, it makes a woof sound. The method name is the same in both classes (make_sound), but each performs differently based on its own nature.
In inheritance, the child can change the parent's behavior, which is called Method Overriding.
class Animal:
    def make_sound(self):
        print("Unspecified animal sounds")

class Cat(Animal):
    # Overriding the parent method
    def make_sound(self):
        print("Meow meow!")

class Dog(Animal):
    # Overriding the parent method
    def make_sound(self):
        print("Woof woof!")

# A function that takes an animal object and produces its sound
def animal_concert(animal_object):
    animal_object.make_sound()

# Creating objects
my_cat = Cat()
my_dog = Dog()

# Polymorphism in action: a fixed function with different inputs produces different results
animal_concert(my_cat) # Output: Meow meow!
animal_concert(my_dog) # Output: Woof woof!
Challenges and Exercises
To become fully proficient in these advanced concepts, we will review and solve three realistic and combined challenges line by line.
Challenge: Secure Bank Account Management System
Question: Create a class called BankAccount that takes the account holder's name and initial balance. Design methods for "deposit", "withdraw", and "display balance". In the withdraw method, ensure that if the balance is insufficient, it does not allow the withdrawal and prints an error message.
Solution approach and code explanation:
In the class constructor, we store the account holder's name and balance. In the deposit method, we add the amount to the balance. In the withdraw method, we first put a condition with if; if the requested amount is greater than the current balance (self.balance), we print a warning message and stop the operation; otherwise, we deduct the amount.
class BankAccount:
    def __init__(self, owner, balance=0):
        self.owner = owner
        self.balance = balance

    def deposit(self, amount):
        self.balance += amount
        print(f"Amount {amount} Tomans deposited. New balance: {self.balance}")

    def withdraw(self, amount):
        if amount > self.balance:
            print(f"Error: Insufficient balance! Your current balance: {self.balance} Tomans")
        else:
            self.balance -= amount
            print(f"Amount {amount} Tomans withdrawn. New balance: {self.balance}")

    def display(self):
        print(f"Account holder: {self.owner} | Balance: {self.balance} Tomans")

# Testing the banking system
account = BankAccount("Saleh Askari", 500000)
account.deposit(200000)
account.withdraw(800000) # Gives an error because balance is 700,000 Tomans
account.withdraw(300000) # Executes successfully
Challenge: Employee Payroll System with Inheritance
Question: Create a base class called Employee that takes the name and employee ID. Then create two child classes called FullTimeEmployee (fixed monthly salary) and PartTimeEmployee (hourly salary: based on hours worked and hourly rate). Both child classes should have a method called calculate_salary to calculate the salary (polymorphism).
Solution approach and code explanation:
The parent class records general information. The first child class takes a feature called monthly_salary and simply returns it. The second child class takes two specific features called hours_worked and hourly_rate. The salary calculation method in the second child multiplies these two numbers together. This is a complete example of combining inheritance and polymorphism.
class Employee:
    def __init__(self, name, id):
        self.name = name
        self.id = id

class FullTimeEmployee(Employee):
    def __init__(self, name, id, monthly_salary):
        super().__init__(name, id)
        self.monthly_salary = monthly_salary

    def calculate_salary(self):
        return self.monthly_salary

class PartTimeEmployee(Employee):
    def __init__(self, name, id, hours_worked, hourly_rate):
        super().__init__(name, id)
        self.hours_worked = hours_worked
        self.hourly_rate = hourly_rate

    def calculate_salary(self):
        return self.hours_worked * self.hourly_rate

# Creating objects and calculating salaries
emp1 = FullTimeEmployee("Mohammad Moradi", "101", 15000000)
emp2 = PartTimeEmployee("Ali Shafiei", "102", 80, 120000)

print(f"Salary of Mr. {emp1.name}: {emp1.calculate_salary()} Tomans")
print(f"Salary of Mr. {emp2.name}: {emp2.calculate_salary()} Tomans")
Challenge: Roles and Permissions System in a Website
Question: Create a class called User that records username and email, and has a method called show_permissions that prints "Permission: read-only access". Then create a child class called Admin that, in addition to inheritance, overrides the permissions method to print "Permission: full site and user management". The admin should also have a specific method called delete_comment to delete comments.
Solution approach and code explanation: This challenge shows us how a child class can both customize (override) old behaviors and add completely new tools that regular users do not have access to.
class User:
    def __init__(self, username, email):
        self.username = username
        self.email = email

    def show_permissions(self):
        print(f"User {self.username} -> Permission: read-only access")

class Admin(User):
    def __init__(self, username, email, admin_level):
        super().__init__(username, email)
        self.admin_level = admin_level # Management level

    # Overriding the parent method (polymorphism)
    def show_permissions(self):
        print(f"Admin {self.username} (Level {self.admin_level}) -> Permission: full site management")

    # Admin-specific method
    def delete_comment(self, comment_id):
        print(f"Admin {self.username} deleted comment with ID {comment_id}.")

# Checking permissions
user_simple = User("saleh_user", "saleh@example.com")
user_admin = Admin("narjes_admin", "narjes@example.com", "Senior")

user_simple.show_permissions()
user_admin.show_permissions()

# A regular user does not have this method and the program would error if called
user_admin.delete_comment(2044)
Session 8: Modules, Libraries, and pip Tool
Concept of Module, Package, and Library
So far, all the code we've written has been in a single file. But imagine you're developing a large program with thousands of lines of code. If you leave all this code in one file, finding a specific line or fixing an error will be extremely difficult.
Python has introduced a code management and separation structure to solve this problem. Let's learn these concepts with a real and very simple analogy:
- Module: A simple Python file with a
.pyextension that contains some ready-to-use functions or variables. A module is like a "specific tool" (for example, a wrench or screwdriver) in your toolbox. - Package: A collection of several related modules (files) placed inside a folder. A package is like a "specific drawer or section" of your large toolbox that collects similar tools together.
- Library: A very large and comprehensive collection of various packages and modules gathered together to solve a broad category of problems (like graphics, mathematics, or game development). A library is like the "workbench or giant toolbox" itself.
Import Statements and Different Import Methods
To be able to use code written in another module or library, we need to import them into our current program. Python uses the import keyword for this, which can be written in several different ways.
Method 1: Importing the Entire Module
In this method, you import the entire file or library. To use the tools inside it, you must first write the module name and then a dot (.):
import math

# Using the square root function from the math library
result = math.sqrt(16)
print(result) # Output: 4.0
Method 2: Importing a Specific Tool (From ... Import)
If you only need one or a few specific functions and don't want to load the entire library, you use this method. In this case, you no longer need to write the library name and dot before the function:
from math import sqrt, pi

print(sqrt(25)) # Output: 5.0
print(pi)       # Output: 3.1415
Method 3: Using an Alias (As)
Sometimes a module or library name is too long, or you want to shorten its name in your program to speed up coding:
import datetime as dt

# Getting the current system time
now = dt.datetime.now()
print(now)
Creating Our Own Custom Module
The biggest advantage of modules is that you can create them yourself! Let's make a small tool for geometric calculations.
Create a file named geometry.py and put the following code in it (this file is our module):
# Contents of geometry.py file
PI = 3.1415

def circle_area(radius):
    return PI * (radius ** 2)

def rectangle_area(width, height):
    return width * height
Now create a new file in the same folder called main.py (the main program) and call your module in it:
# Contents of main.py file
import geometry

area1 = geometry.circle_area(5)
area2 = geometry.rectangle_area(4, 6)

print(f"Area of circle: {area1}")
print(f"Area of rectangle: {area2}")
Just like that, you've categorized and separated your code!
What is the pip Download Tool?
Python is an endless ocean. Millions of programmers around the world have written amazing code and made it available for free on the internet for others to download. But how do we install these libraries on our computer?
The pip tool (short for Pip Installs Packages) is actually the large marketplace or store of Python (similar to a bazaar, Google Play, or App Store on your phone). You don't need to visit different websites and download files; you just need to know the name of the library you want.
How to Use pip
To use pip, you shouldn't write code inside the Python environment! Instead, you need to open the terminal (Terminal) or Command Prompt (CMD) on Windows and type the following commands:
- Command to install a new library:
pip install library_name
(Instead of library_name, write the name of the desired library, for example, turtle).
- Command to uninstall a library:
pip uninstall library_name
- Viewing the list of all libraries installed on your system:
pip list
Introduction to Standard and Exciting Libraries to Get Started
Python comes with some extremely entertaining built-in tools that don't require installation and make understanding code logic very engaging and visual for beginners.
The Magical and Visual Turtle Library (Turtle Painter)
The turtle library is one of the best tools for learning Python. Python gives you a virtual turtle with a pen attached to its tail! You give it commands with your code to move forward, turn, and draw on the screen. This library greatly helps in understanding loops and functions.
import turtle

# Creating a painter turtle
my_turtle = turtle.Turtle()
my_turtle.shape("turtle") # Make our painter look like a turtle
my_turtle.color("red")    # The pen color becomes red

# Command to the turtle to draw a square with a for loop
for i in range(4):
    my_turtle.forward(100) # Go forward 100 steps
    my_turtle.right(90)    # Turn 90 degrees to the right

# Keeping the drawing window open after completion
turtle.done()
The Random Library (Generating Random Choices)
This library is extremely practical and tangible for building number guessing games, lotteries, or chance simulations.
import random

# 1. Generating a random integer between 1 and 6 (dice simulation)
dice = random.randint(1, 6)
print(f"Your dice number: {dice}")

# 2. Randomly selecting a classmate for a presentation
students = ["Ali", "Sara", "Reza", "Maryam"]
selected = random.choice(students)
print(f"Selected person: {selected}")
The Creative Cowsay Library (Talking Cow - Requires pip installation)
Let's use the pip tool we learned about! First, go to CMD or terminal on your computer and type: pip install cowsay.
Now this fun library has been added to your Python and you can write funny code with it:
import cowsay

# Command to a cartoon cow to say your words!
cowsay.cow("Hello! I'm glad you're learning Python!")
Challenges and Classroom Solved Exercises
To fully solidify the concepts of this session, we'll review three complete programming challenges appropriate for beginners with step-by-step solutions.
Challenge: Drawing Regular Polygons with Turtle and Functions
Question: Write a function that takes the number of sides of a geometric shape (e.g., triangle, square, pentagon) along with the side length from the user and automatically draws the shape using the turtle library.
Solution method and code logic explanation:
The mathematical formula for rotation in polygons is: the sum of exterior angles is always 360 degrees. So if we divide 360 by the number of sides, we get the exact turning angle for the turtle. We repeat this logic inside a for loop for the number of sides to complete the shape.
import turtle

def draw_shape(sides, side_length):
    my_turtle = turtle.Turtle()
    my_turtle.color("blue")

    # Calculating the rotation angle
    angle = 360 / sides

    for i in range(sides):
        my_turtle.forward(side_length)
        my_turtle.left(angle) # Turn left based on the calculated angle

# Test: Draw a regular hexagon with side length of 70 steps
draw_shape(6, 70)

turtle.done()
Challenge: Rock, Paper, Scissors Game Against the Computer
Question: Write a program that simulates the famous Rock, Paper, Scissors game. The user enters their choice and the computer makes a random choice using the random library, then announces the winner.
Solution method and code logic explanation:
We put the options in a list. We determine the computer's choice with random.choice(). We compare the user's input with the computer's choice using if and elif structures to determine the winner, loser, or tie.
import random

def play_game():
    options = ["Rock", "Paper", "Scissors"]

    print("--- Welcome to Rock, Paper, Scissors ---")
    user_choice = input("Your choice (Rock, Paper, Scissors): ").strip()

    if user_choice not in options:
        print("Invalid choice!")
        return

    # Computer's random choice
    computer_choice = random.choice(options)
    print(f"Computer's choice: {computer_choice}")

    # Checking the winning logic
    if user_choice == computer_choice:
        print("Result: It's a tie!")
    elif (user_choice == "Rock" and computer_choice == "Scissors") or \
         (user_choice == "Paper" and computer_choice == "Rock") or \
         (user_choice == "Scissors" and computer_choice == "Paper"):
        print("Congratulations! You won!")
    else:
        print("Computer won! Try again.")

# Run the game
play_game()
Challenge: Drawing a Magical Colorful Circle
Question: Using a for loop and your creativity, make the painter turtle draw many circles with slightly different angles to create a very beautiful artistic graphic.
Solution method and code logic explanation:
We can draw a circle with radius 80 using the my_turtle.circle(80) method. If we put this inside a loop and rotate the turtle's heading by, say, 10 degrees after drawing each circle, the next circle will be drawn at a new angle, creating a unique flower-like pattern.
import turtle

def draw_magic_circles():
    window = turtle.Screen()
    window.bgcolor("black") # Set background to black to make the drawing more attractive

    artist = turtle.Turtle()
    artist.speed(0) # Set turtle speed to the fastest possible
    artist.color("cyan")

    # Drawing 36 circles in different directions
    for i in range(36):
        artist.circle(80)   # Drawing a circle
        artist.left(10)     # Change direction by 10 degrees for the next circle

    turtle.done()

# Running the artistic challenge
draw_magic_circles()
Session 9: Introduction to Python in the Data World (NumPy, Pandas, and Matplotlib)
The Concept of Data Analysis and Why We Need New Tools?
So far, we have been using Python's default data structure, the list, for storing collections. Lists are great for general purposes, but when we are dealing with millions of data points (like sales information from a large store or grades of all students in a country), two major problems arise:
- Low Speed: Python lists are very slow for heavy and million-level mathematical calculations.
- Lack of Computational Tools: If you want to calculate the average, the highest value, or plot a list, you have to write many loops and conditions yourself.
In this session, we will get to know three incredibly popular tools that have made Python the most powerful language for working with data.
Do you remember that in the previous session we got familiar with the pip tool? To use these three libraries, you first need to open your computer's terminal or CMD and write this simple command to install all three at once:
pip install numpy pandas matplotlib
NumPy Library (Fast Numerical Computing)
The NumPy library (short for Numerical Python) is a tool that allows us to create lists of numbers that perform mathematical calculations at an incredible speed (up to 100 times faster than regular Python lists). These advanced lists are called Arrays.
By standard convention, programmers import this library with the alias np.
Creating a Numeric Array and Performing Calculations on It
In regular Python lists, if you add two lists with the + operator, they get concatenated. But in NumPy, operations are performed mathematically and element-wise:
import numpy as np

# Creating two simple numeric arrays
scores_term1 = np.array([15, 18, 12, 20])
scores_term2 = np.array([17, 16, 15, 19])

# Adding the scores of two terms element-wise and mathematically
total_scores = scores_term1 + scores_term2
print("Total scores:", total_scores)  # Output: [32 34 27 39]

# Multiplying all scores by 2 simultaneously
doubled_scores = scores_term1 * 2
print("Doubled scores:", doubled_scores)  # Output: [30 36 24 40]
Ready-made Mathematical Tools in NumPy
You don't need to write loops to calculate the average or find the highest score; NumPy has ready-made methods for these:
import numpy as np

prices = np.array([5000, 12000, 8500, 23000, 11000])

print("Average price:", np.mean(prices))  # Automatically calculates the average of prices
print("Maximum price:", np.max(prices))   # Finds the highest price
print("Minimum price:", np.min(prices))   # Finds the lowest price
Pandas Library (Data Management in Tabular Form)
If NumPy is for working with a line of numbers, the Pandas library is for working with tables! Pandas allows you to import a file like Excel into Python, name its rows and columns, and interact with it exactly like a real table.
In Pandas, these tables are called DataFrames. Pandas is usually imported with the alias pd.
Creating a Simple Table (DataFrame) in Python
Let's create a table of product specifications and warehouse inventory using a dictionary:
import pandas as pd

# Our initial data structured in a dictionary
data = {
    "product_name": ["Laptop", "Mouse", "Keyboard", "Monitor"],
    "price": [35000000, 450000, 1200000, 8500000],
    "stock": [5, 20, 15, 8]
}

# Converting the dictionary to a Pandas table (DataFrame)
df = pd.DataFrame(data)

# Displaying the entire table in the program output
print(df)
The output of this code will be a very clean and organized table as shown below:
  product_name     price  stock
0       Laptop  35000000      5
1        Mouse    450000     20
2     Keyboard   1200000     15
3      Monitor   8500000      8
Filtering and Extracting Information from the Table
Pandas allows you to easily extract specific parts of the table:
import pandas as pd

# Displaying only the column containing product names
print(df["product_name"])

# Filtering products that have more than 10 items in stock
high_stock_items = df[df["stock"] > 10]
print(high_stock_items)
Matplotlib Library (Plotting and Visualization)
Looking at dry and empty numbers in a table is not always appealing. Humans understand data much better when they see charts. The Matplotlib library is the drawing and plotting tool in Python. We usually use the pyplot module from it with the alias plt.
Plotting a Simple Line Chart
import matplotlib.pyplot as plt

# Data for days of the week and daily sales
days = ["Sat", "Sun", "Mon", "Tue", "Wed"]
sales = [12, 19, 15, 25, 22]

# Plotting a simple line chart
plt.plot(days, sales, marker='o', color='green')

# Adding the main title and labels for horizontal and vertical axes to the chart
plt.title("Daily Sales Performance")
plt.xlabel("Days of the Week")
plt.ylabel("Number of Sales")

# Finally displaying the chart on the computer screen
plt.show()
Importing a Real Dataset, Formatting, and Data Analysis
Now let's combine all these tools in a real-world scenario. Suppose we have a file named students_report.csv that stores the grades of students in a class. We want to import this file, examine its status, add a new column to it, and finally plot its chart.
Step One: Reading the CSV File
Using the pd.read_csv command, we can directly convert the file into a table:
import pandas as pd
import matplotlib.pyplot as plt

# Loading and reading the Excel or CSV file in Python
df = pd.read_csv("students_report.csv")

# Displaying only the first 2 rows as a sample to understand the file structure
print(df.head(2))
Step Two: Formatting and Data Analysis (New Column and Filtering)
Suppose we want to add 2 points as a bonus to all students' scores and find those whose final score is above 15:
import pandas as pd

# Adding a new calculated column called final score
df["final_score"] = df["actual_score"] + 2

# Filtering and finding the top students of the class
top_students = df[df["final_score"] >= 15]
print("--- Top Students ---")
print(top_students[["name", "final_score"]])
Step Three: Plotting a Bar Chart of Student Scores
import matplotlib.pyplot as plt

# Plotting a bar chart for better comparison of the final scores of the entire class
plt.bar(df["name"], df["final_score"], color="skyblue")

# Beautifying and naming different parts of the chart
plt.title("Class Final Scores Report")
plt.xlabel("Student Name")
plt.ylabel("Scores")

# Finally displaying the chart window
plt.show()
Challenges and Exercises
To consolidate these concepts, we will solve three highly practical challenges in the world of data analysis.
Challenge: Automatic Profit Calculation with NumPy
Question: An array of "purchase prices" for 5 items and another array of "selling prices" for the same 5 items are given. Using NumPy arrays, create a new array that shows the profit for each item. Then determine what the maximum profit was?
Solution Approach and Code Logic Explanation:
First, we convert the lists to NumPy arrays. Since arrays understand element-wise calculations, by subtracting the purchase array from the sales array, we get the profits array. Finally, we use the np.max() method to find the highest profit.
import numpy as np

# Entering the list of purchase and sale prices in thousands of Tomans
purchase = np.array([100, 250, 80, 400, 150])
sale = np.array([130, 290, 110, 450, 180])

# Calculating the profit for each item simultaneously and element-wise
profits = sale - purchase
print("Profits per item:", profits)  # Output: [30 40 30 50 30]

# Finding the highest profit earned
max_profit = np.max(profits)
print("Maximum profit earned:", max_profit)
Challenge: Managing Employee Information and Filtering Salaries with Pandas
Question: Create the following employee information table in Pandas. Write a program that finds employees who work in the "Sales" department and have a salary above 12 million, and prints their names.
name  | department | salary
Ali   | Sales      | 14000000
Sara  | Finance    | 16000000
Reza  | Sales      | 10000000
Mary  | Sales      | 15000000
Solution Approach and Code Logic Explanation:
First, we create the table with pd.DataFrame. To filter with two conditions simultaneously, we put each condition in parentheses and use the & operator (meaning logical "and" in Pandas).
import pandas as pd

# Creating an initial dictionary for employee information
employees_data = {
    "name": ["Ali", "Sara", "Reza", "Mary"],
    "department": ["Sales", "Finance", "Sales", "Sales"],
    "salary": [14000000, 16000000, 10000000, 15000000]
}

# Converting the dictionary to a Pandas DataFrame
df = pd.DataFrame(employees_data)

# Applying two conditions simultaneously: 1. Department must be Sales 2. Salary greater than 12 million
filtered_df = df[(df["department"] == "Sales") & (df["salary"] > 12000000)]

# Printing the final output of qualified people's names
print("Qualified Employees:")
print(filtered_df["name"])
Challenge: Clean Air Analysis and Visualization with Charts
Question: Suppose you have a table of the average air pollution index of a city for the first 5 months of the year. You want to find the month with the worst pollution using Pandas and plot a line chart of the air pollution trend.
month | aqi_index
Month1 | 65
Month2 | 80
Month3 | 110
Month4 | 145
Month5 | 130
Solution Approach and Code Logic Explanation:
We first create the table and use the max() method to find the highest index (the higher the AQI index, the more polluted the air). Then we plot a line chart using the Matplotlib library and customize its appearance with dashed red lines to convey a warning state.
import pandas as pd
import matplotlib.pyplot as plt

# Defining the structure of information for months and air quality index
weather_data = {
    "month": ["Month1", "Month2", "Month3", "Month4", "Month5"],
    "aqi_index": [65, 80, 110, 145, 130]
}

# Converting the data to a table
df = pd.DataFrame(weather_data)

# Finding the highest pollution index value in the entire column
worst_aqi = df["aqi_index"].max()

# Finding the name of the month to which this highest index belongs
worst_month = df[df["aqi_index"] == worst_aqi]["month"].values[0]
print(f"Worst month: {worst_month} with AQI: {worst_aqi}")

# Plotting the pollution trend chart as a dashed red line with X markers for key points
plt.plot(df["month"], df["aqi_index"], marker='X', linestyle='--', color='red')

# Setting visual features of the chart for better readability
plt.title("Air Quality Index Trend")
plt.xlabel("Months")
plt.ylabel("AQI Score")
plt.grid(True)  # Enabling background grid lines

# Displaying the graphical chart window to the user
plt.show()
Session 10: Final Project of Python Course: Developing an Intelligent Dashboard for Habit Management (Smart Habit Tracker)
Project Description
In this final project, you are going to design a completely real and practical system for daily life. The goal of this project is to implement a Habit Tracker and Daily Task Manager based on Object-Oriented Programming (OOP) architecture under the terminal. This program is connected to a permanent storage file and ultimately analyzes your data as a graphical and stylish chart.
Educational Objectives and Topics Assessed in This Project
By implementing this program, all the topics you have learned throughout the course will be connected and consolidated in a chain-like manner:
- Object-Oriented Programming (OOP): Building a single class for modeling each habit along with its attributes and internal methods.
- Loop and Conditional Structures: Managing the main program menu live and continuously (
while Trueandif-elif). - Data Structures and Lists: Managing and maintaining constructed objects within a main list.
- File Management (File I/O): Permanently storing information in a
CSVfile so that data is not lost when the program is closed. - Error Management (Exception Handling): Handling incorrect user inputs (
try-except) to prevent the program from crashing. - Data Analysis and Visualization (Pandas & Matplotlib): Loading the repository table and drawing a comparative bar chart.
Data Structure and Storage Architecture
Your program should store information in a text file named habits.csv. Each habit has 3 main attributes that are defined in the class:
- habit_name: The name of the habit (e.g.,
ReadingorGym). - target: Your goal (how many times per month you should do this, e.g.,
20times). - done: Current progress (how many times it has been done so far, e.g.,
12times).
The data storage format in the file must be exactly as follows (separated by commas):
habit_name,target,done
Reading,20,12
Gym,15,8
Water,30,25
Step-by-Step Guide for Implementing the Project (Main Code Sections)
To write this project, divide your code structure into the following sections.
Step One: Designing the Habit Class
- Create a class named
Habit. - The constructor method (
__init__) of this class should receive and initialize the habit name, target, and the amount done (which defaults to zero). - Write a method (behavior) inside the class called
add_progressthat, whenever called, adds one unit to the amount done (done).
Step Two: File Management and Setup
- Write functions that, at the beginning of the program, read the
habits.csvfile, create an Object from theHabitclass for each row, and store all these objects in a main list calledhabits_list. - Write a function that, when changes are made, converts the list of objects back to CSV format and saves it in the CSV file.
Step Three: Interactive Menu and Habit Management (Core Features)
- Create a main loop that, until the user selects the exit option, prints the following options:
- Display current status of habits (by iterating over the list of objects and printing the attributes of each object)
- Add a new habit (creating a new object from the class and updating the file)
- Log daily progress (calling the
add_progressmethod on the selected object) - View graphical dashboard
- Exit the program
- In the target input section, be sure to use
try-exceptso that if the user enters text, the program does not throw an error.
Step Four: Chart and Dashboard (Data Visualization)
- Write a function that uses
pd.read_csvto load the data file into Pandas. - Using
Matplotlib, draw a bar chart (plt.bar) in which the target ceiling of each habit is compared alongside the user's actual progress with two different colors.
Sample Guide Code (To Get Started)
Open your programming environment, write the class structure and initial menu below, and start filling in the internal sections:
import os
import pandas as pd
import matplotlib.pyplot as plt

FILE_NAME = "habits.csv"

# Step One: Designing the template and object-oriented class for each habit
class Habit:
    def __init__(self, habit_name, target, done=0):
        self.habit_name = habit_name
        self.target = int(target)
        self.done = int(done)

    def add_progress(self):
        # Method to increase progress by one unit
        self.done += 1

def load_habits():
    # Reading the file and converting each row to an object from the Habit class and returning a list
    habits_list = []
    return habits_list

def save_habits(habits_list):
    # Taking the list of objects and saving their attributes into the CSV file
    pass

def main():
    # Loading the list of habit objects at the beginning of the program
    my_habits = load_habits()

    while True:
        print("\n=== OOP SMART HABIT TRACKER ===")
        print("1. Show Status | 2. Add Habit | 3. Log Progress | 4. Dashboard | 5. Exit")
        choice = input("Select an option: ")

        if choice == "5":
            break

if __name__ == "__main__":
    main()